Pressure Sensor

For the first week’s homework assignment, I decided I wanted to build a switch that could be used in a variety of ways. Although the examples that we examined in class, such as the mustache switch, were creative,  they seemed rather limited  and required very precise conditions to operate. In addition, I felt that simply modifying previous examples by simply using a different body part to activate the switch seemed unoriginal. This left me with two primary paths to explore for this project.

  1. Create a switch that is powered something other than human interaction (e.g. wind, heat, water, etc.).
  2. Create a more general purpose switch which can be powered by a variety of sources.

I ended up choosing the second of these options, as it opened a broader array of possibilities for interaction, and seemed more conducive to creating a reliable device that wasn’t limited to very narrow parameters.

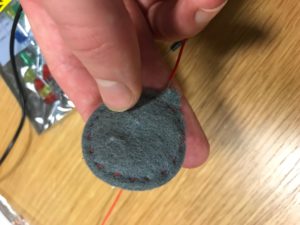
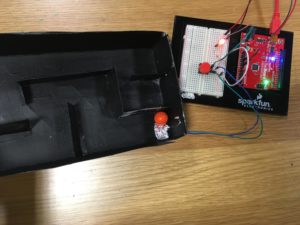
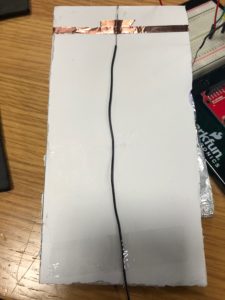
Following this path, I decided to build a pressure sensor, which would activate a light when pressed down upon. To test the idea, I placed two pieces of copper tape, each connected to a wire, on opposite sides of a piece of fabric containing a hole in the middle. When the wires were pressed, the two strips of copper tape would touch, completing a circuit. When they were released, the switch would open, breaking the circuit.

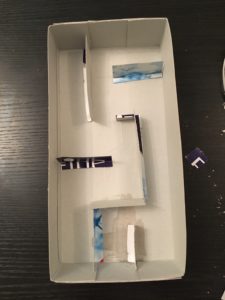
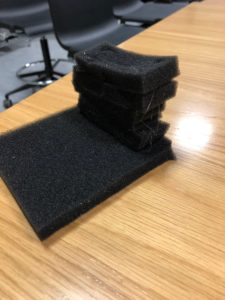
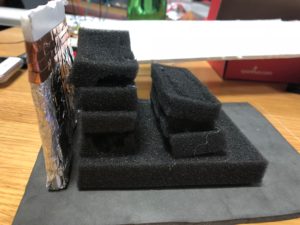
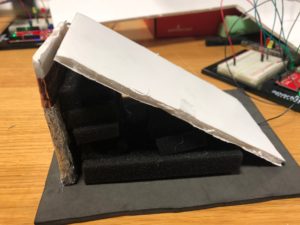
This early version had several issues, however. The fabric had to be pressed together in a specific place to close the circuit, making it difficult to turn on the light by simply placing an object on top of the switch. To solve this, I built a enclosure around the switch using two pieces of wood that I found in the lab, as well as several pieces of foam. When pressed, the foam compressed and the top piece of wood came into contact with the fabric, activating the switch. However, I found it difficult to keep the wires of the circuit connected to the copper tape in the switch.

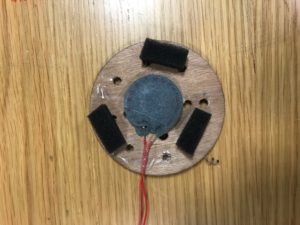
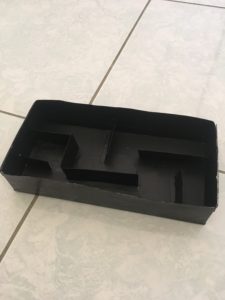
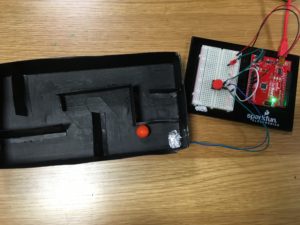
To fix this, I built one final version, using metal buttons to clamp the copper tape, fabric, and wires together. I also replaced the wood enclosure with new laser-cut wood parts, and added shrink wrap to make the wires neater.

Final Product

Maze Project

For this project, I decided to build a maze that activated the LED light when the ball reached the end of the maze.

I started by building the maze out of a cardboard box:


I then needed to figure out how I would be able to get two pieces of aluminum foil to hit into each other. At first, I thought I would be able to get the ball to hit into one standing piece of aluminum foil so that it would then hit the next piece of aluminum, where the contact of the two pieces would serve as a switch and activate the light. However, I couldn’t manage to find a way to do that while also having the aluminum attached to the wires because I was thinking of the contact like having a dominos effect.

I then decided to try and see whether I could have the ball be the medium of contact by covering it in aluminum and then having it touch a piece of aluminum at the end of the maze which would activate the switch. Again, the issue of wires came up, where having the wire attached to the ball wasn’t feasible and would get in the way of the game.

I then decided that perhaps the best was to have the ball press down on a piece of aluminum to achieve contact. I decided to test whether putting two pieces of cardboard (covered in aluminum) in a sea-saw shape would be able to work. It managed to work and so I then tested whether the balls weight was enough to push down the top piece of cardboard. This idea worked! I then glued the bottom piece of aluminum to the end of the maze, and connected the wires through the sides of the cardboard.

Here are some pictures of the final product:

Project 1 – The AnyBall game

Upon receiving the instructions to make this project I knew that I wanted to make a game. My general idea was to make a game which would signal when a ball hit the assigned space. The assigned surface would be a kind of sandwich containing 2-3 layers. The first layer (bottom) would be cardboard to contrast from the rest of the ‘game board’, the second aluminum for conductivity and the third a flexible conductive fabric that a ball would hit. The circuit for the LED would be complete when the aluminium and upper layer connect. I began by making a few sketches: 
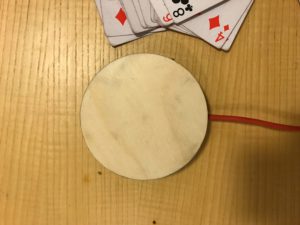
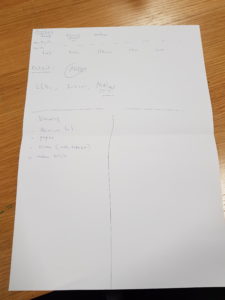
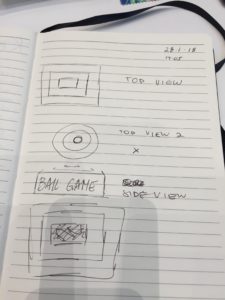
There were a couple of designs that I thought of. One of the ideas consisted of circles but I decided against it because it would logistically be a hassle. Using a square or rectangle would work just as well and without the trouble.

The box itself is cardboard as it is inexpensive and easy to use. I began to make the box by designing it using Adobe Illustrator. After making the design, I used the laser cutter to make the box parts.

Next I spray painted all the parts to make it more aesthetically pleasing. Silver was the only paint available to me.

After doing this, I tested some fabrics for the upper layer of the sandwich. Upon testing some, I decided on chicken wire as it was both flexible and the most conductive. After choosing chicken wire, I also lined the bottom of the assigned space square with aluminium. 
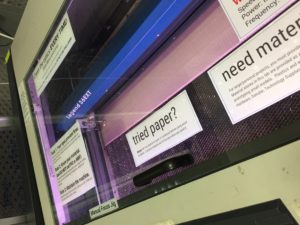
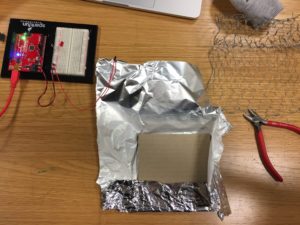
After making sure the LED turns on, I cut and taped some wire to both the aluminum and chicken wire. I put all of the parts together using hot glue.

It is aesthetically displeasing but I could not use electrical tape as it would not hold the chicken wire.

Upon finishing the construction, I wired all of the parts together. This is a picture of the final product:


Create Some Ambiance Whilst You Play the Drums?

Perhaps one way in which drumming could become more fun is to provide some lights to accompany the beat. That was the intention of my project. I decided to make a foot pedal that would make lights go on when pressed down.

After scavenging in the junk shelf, I started off with gathering some sponges that would allow for not only the compression part during the pressing down of the pedal but also allow for pedal board to bounce back.

Figure 1: Example of How I Arranged the Sponges

I then glued the sponges onto a padding that had a surface that had more grip to allow the structure not to slide during the stepping of the pedal.

Figure 2: The Arrangements of Sponges on the Surface with More Grip

I decided that the easiest way for me to create a pedal that would switch on the lights when pressed on is when, when the pedal is in neutral position, there is nothing there to conduct electricity. I realised that for me to have a surface that had a section that could be an insulator and a larger section that would act as a conductor, I would need to use something like a styrofoam board where I would cover the larger section with a conductor. I marked 1.5 cm off the top of a styrofoam board and covered the larger section with aluminium foil. To make sure it stays and to cover with another layer of conductor, I applied some copper tape on top of the aluminium.

Figure 3: Aluminium Foil and Copper Tape on Styrofoam Board

I then stuck the board onto the grip surface like Figure 4 shows below.

Figure 4

For the circuit and the switch to work, I needed to stick a piece of wire to the back of the board of the pedal so that when stepped on, the tip of the wire would connect with the conductive elements of the backboard as seen in figure 3 and 4. Figure 5 below shows this process.

Figure 5: Wire behind the board of the “pedal”

Figure 6 shows the side view after sticking the pedal board onto the grip surface. I made sure to leave some space between the backboard and the pedal board so that when stepped on, the surfaces wouldn’t get stuck as easily.

Figure 6

Figure 7 shows the final result of the pedal. I cut out some more styrofoam boards to fit onto the two sides so that the sponges inside are enclosed and so that the overall look of the pedal is more structured. As well, not pictured here, but one more wire was taped to the back of the backboard so that the circuit is closed.

Figure 7

The finished product is shown in the video below! Now you can have lights to accompany your drum beat!

Ivory’s Pedal Lights


P.S. Not seen in the pictures but I made sure to measure the dimensions of the styrofoam boards so that they would piece together nicely. The gluing together of the boards and of the sponges were done through the use of a hot glue gun.

There are no Electrons

Unlike conventional informative texts, this book is written in a very colloquial and humorous manner. With his funky analogies and rhetorical questions, Kenn Amdahl is able to effectively convey his message to the reader. The author was not wrong to claim that his reader will enjoy this book even if you have no special desire to learn about electricity. The text was indeed very enjoyable to read.

However, I do feel that the text could improve on its educational value. The very things that made the text interesting sometimes felt quite distracting. Moreover, some of his scientific explanations were rather vague and not all that informative.

Personally, I do prefer traditional textbooks when the objective is to acquire reliable academic information on a certain subject. Nonetheless, this was an interesting and entertaining read.

The Switch Proj

While strolling through the Baraha at 3am in the morning, I came across the pin ball machine. I gave it a couple tries and noticed that the LEDs lit up when the ball collided with certain areas in the apparatus.

Building on that concept, I created a simple maze that began in the top left corner and ended in the bottom right. When the ball (a ping pong ball wrapped in aluminum foil) reached the end of the maze, it will bridge together the two pieces of aluminum foil that are connected to the LED circuit.

It took me a few tries to get the end-of-maze foil dimensions/placement correct as the surface area in which the ball is actually in contact with the surface is quite small. The ball had to be right in the middle of the two pieces of foil in order for the circuit to be complete.

The following is a demonstration of the maze in action:

IMG_8120

There are No Electrons; Only Green Men

Excerpt from the reading. I chose this quote because I believe it accurately describes Amdahl’s intention in writing this book.

Little Green men called “Greenies” were something I did not think I would read about when it comes to electricity in a university setting. I found this reading to be a pleasant surprise, as the information about electricity was conveyed to me in a genuinely interesting manner.

There were no boring statements in the text, as it was full of imagery and metaphors. I even shared some excerpts of the texts with friends, as I found them to be so whimsical but accurate of the things they were describing.

Not only that, but this text helped clear up a lot of the basics of electricity for me. In class I have used Ohm’s Law before, and calculated resistance in a circuit but I had never had some of these basic concepts defined for me. Things like static electricity and voltage; and not only were they defined for me, but were given to me with entertaining and memorable imagery.

Kenn Amdahl succeeded in his intent to make a non-dull, understandable book on electricity, because I truly want to read more.


The Blowback Machine!

Our assignment was to create a switch that doesn’t require the use of hands, and one that doesn’t use any programming. So I started off brainstorming different ways of interacting with the switch, and then afterwards what kind of outputs I can get and use.

Brainstorming

Eventually I settled on the idea of blowing as the input, and the use of a motor as the output. I started testing out different ways and materials that I can use to complete a switch with just blowing air. Whatever I used needed to meet 2 criteria:

  1. It had to be conductive
  2. It had to be elastic, as in it had to move when blown on, but return to place when the blowing stops.

After some trial and error with wooden sticks and aluminum foil, I decided on this:

the input

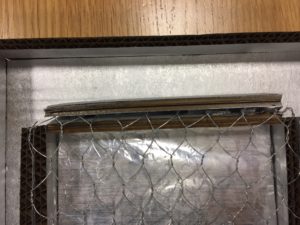
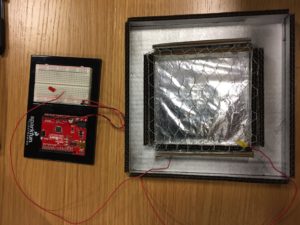
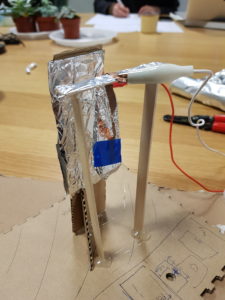
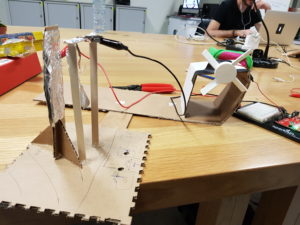
You blow on the hanging piece of cardboard wrapped in foil, and it’ll make contact with the stationary piece of cardboard wrapped in foil. In order to not make the hanging piece of cardboard hefty, the current is transferred through copper tape to the top wooden stick, also wrapped in foil, where the alligator clips connects this piece to the rest of the circuit.

As for the output, I scoured the IM lab for parts and found an already 3D printed fan that attaches to the DC motor. So I came up with the idea of the blowback machine! You blow to activate it and it blows back at you. Here is the final product:

And the circuit diagram:

Scanned_20180128-1438

There are No Electrons

As someone who rarely meddles with the sciences and tries to avoid the confusion of trying to understand it, this reading broke down the concepts of electricity quite clearly to me. The reading was light-hearted and easy to read; the writing was simple which left room to try and understand the concepts more clearly. At some points I did feel quite confused as to what the author was trying to get to from his stories, but then he would manage to tie his ideas together quite nicely.

Although the ideas do come together at the end, I feel as though his intense motivation to oppose the electron theory and be different was more distracting than anything. To be completely fair though, I did grasp the concepts presented and understand the language and meanings associated with electricity.

There are no electrons

When I started reading the book, I got excited by the concept of it. I spent years upon years reading maths, physics, and chemistry textbooks and more often than not they are incredibly confusing for someone who is not very familiar with the topics explained. If I had read “x is left as an exercise for the reader” one more time, I would’ve quit STEM altogether. However I found these series of books by this company, CGP, that did a great job at explaining complicated concepts in an approachable and fun way. I thought this book was going to be similar to that, however it wasn’t. Amdahl does a poor job at explaining the concepts in my opinion, and the book is riddled with fillers. He spent 4 pages setting up the greenie analogy which were entirely fillers! What I’m trying to say is, I can see why this book was rejected by 89 publishers. After a certain amount of “no”s, the world is not wrong, you are.