This article made me think about how we often present our projects in class. What if, instead telling others the purpose and how they are supposed to interact with the project, we simply let them interact, and then expand on their experience after? I resonated with the author’s claim how making interactive work can be difficult because we are taught that a work of art is a work of expression, it’s a statement. To “set up the stage” and let it be, or to suggest intentions without giving the interpretations, appears liberating, scary and un-doable all at the same time. I haven’t really made the shift of considering interactive media to be like a performance where the audience completes the work. This article made me more aware of how I perceive interactive media as an art form, and how I should perhaps begin to perceive it another way.
Category: Your Work
Physical Computing’s Greatest Hits (and misses)
I found it interesting how the author claimed that even though an idea has done before, it doesn’t mean you should give up on it. As someone who is new to physical computing, I try to avoid doing ideas that have already been executed because of the lack of originality it presents. But the author presented many creative ways of fulfilling the ideas that have already been done. He provided a creative account of physical computing instruments and discussed the advantages and disadvantages about them, which I found to be extremely useful and beneficial.
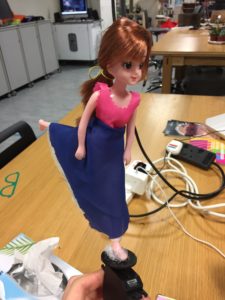
Doll Spin
I don’t know where exactly the idea of a spinning doll came from, but my guess is from those jewelry boxes with the spinning ballerina and the music.
My project was extremely simple this time, I accidentally used a servo instead of a DC motor. Though, if I spent time fixing it I’m sure that I could make it work just as well with a DC motor.
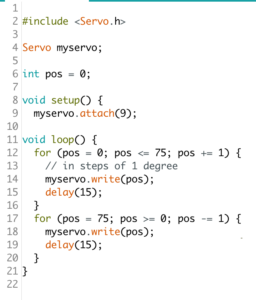
The doll I bought from Daiso. I made the skirt (poorly) using extra fabric and hot glue. Below is the coding:
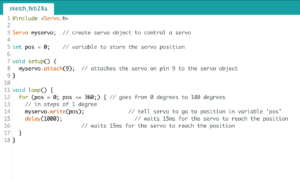
I used an online example and tweaked it in order to fit my continuous servo. The original code would make it turn 180 back and forth.
Here is a picture of the final product:
Physical Computing ‘s Greatest Hit’s and Misses – Response
This article was an good list of inspiring installations that I will definitely return to when thinking about my final project. I found particularly interesting the pixel installations. Perhaps this is because I tend to appreciate the more aesthetic projects rather than amusing or creative ones.
I think it introduced some interesting concepts such as the gloves, it was interesting to see how “simple” coding can create fun and interactive installations.
I don’t really have much to say about this article. I think overall it was interesting to read and it linked some ideas to really amazing examples.
Making Interactive Art: Set the Stage, Then Shut Up and Listen – Response
I enjoyed this article, not only because it was short, but because it reminded me of something that Aaron said in the beginning of the semester that is crucial to IM. During the first lesson he said (I’m paraphrasing here) “I consider myself first and foremost an artist”. This stuck to me and this article is able to communicate a crucial part of being an artist: being able to have your work interpreted. In the sciences and other courses such as engineering, one is often forced to conform to the idea of right and wrong and thus the flexible aspect of IM attracted me.
The fact that one should not prescribe a meaning, a way that an audience should interact and what kind of experience one should get from the project is critical. If one were to prescribe the way in which to interact with an installation, the installation becomes less of an interactive piece, rather it becomes an exhibition.
Lottery Box
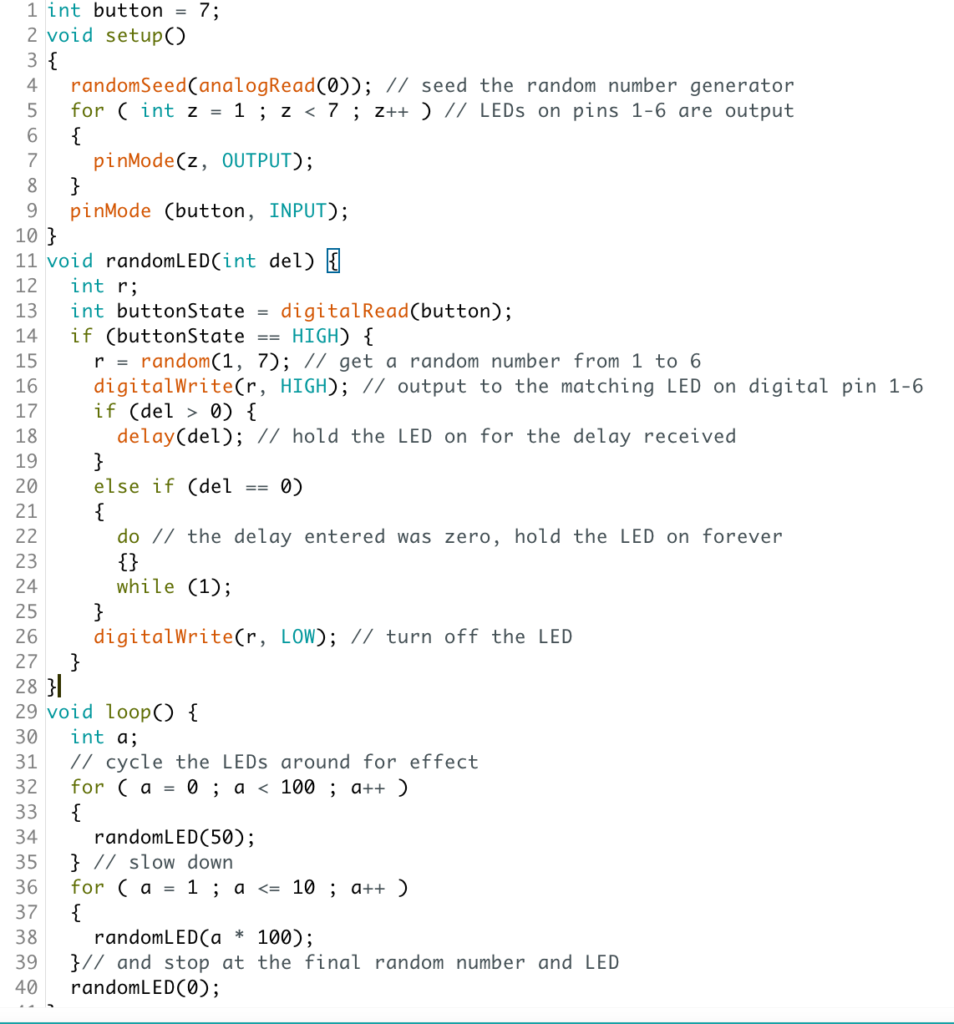
For my stupid pet trick, I wanted to create something that would be kind of dumb, but like a game to play with. After struggling foreverrrrrrrr to come up with an idea, I decided to start from the opposite route. I began by messing around with a few different codes and circuits. One of the circuits and codes I created was a random number generator. That made me think of a dice and the applications that could have in real life.
I began thinking of board games and how that could be a used. I then was thinking about just how random the blinking lights were, and guessing which one would come next was near impossible. Then, it struck me that a lottery would be the perfect setup to use this!
I decided to make a lottery box. The way it worked was that a press of a button would trigger the lights to randomize and see if it matched up with the number drawn. I then had to go back into the code and add in the ‘if’ statement for the button. However, I was not able to make the button so that one click would trigger the motion, rather, the button had to stay consistently down in order to work. This was due to the amount of delays in the code.
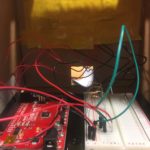
I ended up laser printing the sides of the box out of cardboard and hot glueing them together. As for the lights, I soldered wires of the right length on to them, as well as the button. I then simply painted the boxand printed out a few instructions toadd to the game so that it made more sense, and voila.
High-five!
For this week’s project, I was brainstorming the possible human motions that I could create using a motor. (Also, I didn’t use a DC motor for my final project because I thought that using a servo counted as using a motor oops).
While brainstorming, everytime me and a friend would come up with an idea, we would high-five each other. The ideas would end up not working, mainly due to technical reasons and because I would then look back and be like “nah I don’t like it anymore”. After a while, it hit me that a high-five would be a great human motion, used in everyday life, that could easily be replicated.
I simply cut out a hand shape from styrofoam, glued it onto a cardboard piece, and attached it to a servo that was then attached to wood for stability.
As for the coding, all I did was adjust the angle of the servo’s movement so that it would go back and forth consistently.
Looking back, it would’ve been really cool to add some sort of button, like a photocell, that would detect when someone was moving in for a high-five, and then trigger the movement.
The Stressed Out College Student
This project is a representation of the state of a stressed out college student, say during midterms or finals. If you touch it, this is what happens:
Here is a picture of the internals:
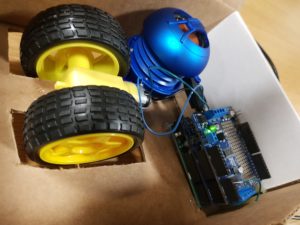
It is basically an Arduino with an mp3 shield controlling the speaker, reading from an SD card, and a motor shield stacked on top of it to control the motor. The motor shield was needed in order to change the direction of rotation of the motor in order to produce the ‘shaking’ effect. And out of the motor shield is a wire sticking out and taped to the box in order to measure capacitance, which is how I’m detecting touch.
Here’s the code:
#include <Wire.h>
#include <Adafruit_MotorShield.h>
#include <SPI.h>
#include <Adafruit_VS1053.h>
#include <SD.h>
#include "pins_arduino.h"

// These are the pins used for the music maker shield
#define SHIELD_RESET  -1      // VS1053 reset pin (unused!)
#define SHIELD_CS     7      // VS1053 chip select pin (output)
#define SHIELD_DCS    6      // VS1053 Data/command select pin (output)
#define CARDCS 4     // Card chip select pin
#define DREQ 3       // VS1053 Data request, ideally an Interrupt pin

// initialize mp3 shield
Adafruit_VS1053_FilePlayer musicPlayer = Adafruit_VS1053_FilePlayer(SHIELD_RESET, SHIELD_CS, SHIELD_DCS, DREQ, CARDCS);

// initialize motor shield
Adafruit_MotorShield AFMS = Adafruit_MotorShield(0x60);
Adafruit_DCMotor *wheels = AFMS.getMotor(2);

int delayval = 100;
const int touchPin = A1;

void setup() {
  // put your setup code here, to run once:
  Serial.begin(9600);
  AFMS.begin();
  //  wheels->setSpeed(255);
  //  wheels->run(FORWARD);
  //  wheels->run(RELEASE);
  if (! musicPlayer.begin()) { // initialise the music player
    Serial.println(F("Couldn't find VS1053, do you have the right pins defined?"));
    while (1);
  }
  Serial.println(F("VS1053 found"));
  if (!SD.begin(CARDCS)) {
    Serial.println(F("SD failed, or not present"));
    while (1);  // don't do anything more
  }
  musicPlayer.setVolume(1, 1);
  musicPlayer.useInterrupt(VS1053_FILEPLAYER_PIN_INT);
  //  Serial.println("playing music");
  //  musicPlayer.playFullFile("track001.mp3");
  //  printDirectory(SD.open("/"), 0);
}


void loop() {
  int capacitance = readCapacitivePin(touchPin);
  Serial.println(capacitance);
  if (capacitance > 5) {
    if (!musicPlayer.playingMusic) {
      musicPlayer.startPlayingFile("scream.mp3");
    }
    wheels->run(FORWARD);
    wheels->setSpeed(255);
    delay(delayval);
    wheels->run(BACKWARD);
    wheels->setSpeed(255);
    delay(delayval);
    wheels->run(FORWARD);
    wheels->setSpeed(255);
    delay(delayval);
    wheels->run(BACKWARD);
    wheels->setSpeed(255);
    delay(delayval);
    wheels->run(FORWARD);
    wheels->setSpeed(255);
    delay(delayval);
    wheels->run(BACKWARD);
    wheels->setSpeed(255);
    delay(delayval);
  } else {
    wheels->run(RELEASE);
  }
  delay(1);
}

uint8_t readCapacitivePin(int pinToMeasure) {
  // Variables used to translate from Arduino to AVR pin naming
  volatile uint8_t* port;
  volatile uint8_t* ddr;
  volatile uint8_t* pin;
  // Here we translate the input pin number from
  //  Arduino pin number to the AVR PORT, PIN, DDR,
  //  and which bit of those registers we care about.
  byte bitmask;
  port = portOutputRegister(digitalPinToPort(pinToMeasure));
  ddr = portModeRegister(digitalPinToPort(pinToMeasure));
  bitmask = digitalPinToBitMask(pinToMeasure);
  pin = portInputRegister(digitalPinToPort(pinToMeasure));
  // Discharge the pin first by setting it low and output
  *port &= ~(bitmask);
  *ddr  |= bitmask;
  delay(1);
  uint8_t SREG_old = SREG; //back up the AVR Status Register
  // Prevent the timer IRQ from disturbing our measurement
  noInterrupts();
  // Make the pin an input with the internal pull-up on
  *ddr &= ~(bitmask);
  *port |= bitmask;

  // Now see how long the pin to get pulled up. This manual unrolling of the loop
  // decreases the number of hardware cycles between each read of the pin,
  // thus increasing sensitivity.
  uint8_t cycles = 17;
  if (*pin & bitmask) {
    cycles =  0;
  }
  else if (*pin & bitmask) {
    cycles =  1;
  }
  else if (*pin & bitmask) {
    cycles =  2;
  }
  else if (*pin & bitmask) {
    cycles =  3;
  }
  else if (*pin & bitmask) {
    cycles =  4;
  }
  else if (*pin & bitmask) {
    cycles =  5;
  }
  else if (*pin & bitmask) {
    cycles =  6;
  }
  else if (*pin & bitmask) {
    cycles =  7;
  }
  else if (*pin & bitmask) {
    cycles =  8;
  }
  else if (*pin & bitmask) {
    cycles =  9;
  }
  else if (*pin & bitmask) {
    cycles = 10;
  }
  else if (*pin & bitmask) {
    cycles = 11;
  }
  else if (*pin & bitmask) {
    cycles = 12;
  }
  else if (*pin & bitmask) {
    cycles = 13;
  }
  else if (*pin & bitmask) {
    cycles = 14;
  }
  else if (*pin & bitmask) {
    cycles = 15;
  }
  else if (*pin & bitmask) {
    cycles = 16;
  }

  // End of timing-critical section; turn interrupts back on if they were on before, or leave them off if they were off before
  SREG = SREG_old;

  // Discharge the pin again by setting it low and output
  //  It's important to leave the pins low if you want to
  //  be able to touch more than 1 sensor at a time - if
  //  the sensor is left pulled high, when you touch
  //  two sensors, your body will transfer the charge between
  //  sensors.
  *port &= ~(bitmask);
  *ddr  |= bitmask;

  return cycles;
}
Spin the pointer
My project this week is literally a finger pointer. It is flat and moves 360 degrees and points to a location randomly. Ideally there would be people around in a circle and when I click the reset button it will turn and point randomly to one person.
I made it more appealing by accelerating the rotation from rest to a high speed and made it random by varying the acceleration randomly by changing the delay value.
Here’s a video of it working:
I’ve also attached the code I used:
const int motorPin = 9;


void setup()
{
    pinMode(motorPin, OUTPUT);
  Serial.begin(9600);
  motorAcceleration();
}


void loop()
{

}


void motorAcceleration()
{
  int speed;
  int delayTime = random(5,25);

  for(speed = 0; speed <= 255; speed++)
  {
    analogWrite(motorPin,speed);
    delay(delayTime);
  }


  for(speed = 255; speed >= 0; speed--)
  {
    analogWrite(motorPin,speed);    // set the new speed
    delay(delayTime);               // delay between speed steps
  }
  delay(1000);
}
The Attempt to Make My Plant Pot More Humanistic
As this week’s prompt is to use a motor to make a human action/emotion, I decided that I wanted to develop on my plant pot project that I had for the midterm.
Because my project then was already essentially anthromorphosising the plant pot into having human characteristics – the raising of the brows and/or the frowning of them – I wanted to develop something that would make it even more human.
Human/Robotic Legs – DISASTER STRIKES
I initially stuck two servos together to build a leg (so I had 4 servos) and angled and programmed them so that they could essentially have some sort of movement that allows them to move forward (the code for it I found online and just made some minor adjustments). The legs worked at first and I thought that I had finished with the assignment but then I realised that two of the servos were burning up. I thought that perhaps it was because I didn’t have a resistor for my servos, but I was questioning this fact because for the previous times that I have used servos, I didn’t use resistors and they worked fine. I decided to scratch this idea and work on something else that perhaps could be more fun and less disastrous.
Spinning “Talk to Me” Sign – not humanistic but used a form of motor
I wanted to stick to my project from last time and develop it, but the only other human characteristics I could think of was something physical/more action-based. Last time’s project was humanistic in the sense that it was an emotion. However, I could only think of either legs, arms, mouths or ears and because the legs didn’t work out, and I thought that the arms would basically resemble Yoon Hee’s project, and the ears and mouths would basically be the same thing as the eyebrows I made. I, therefore, decided to move away from making something that resembled some sort of human characteristic (essentially what I made last week) to making something really stupid (perhaps an addition to my stupid pet-trick).
I wanted to make a sign that would say “Talk to Me” when the sound detector doesn’t detect any sound and would not say anything when the sound detector detects sound.
I didn’t know how to do the above and so I settled on just having a sign that would rotate with the servo and would spin when there wasn’t a sound detected and would stop the spinning if a sound was detected.
The code for this project was developed from my project from last time where I added another servo:
#define PIN_GATE_IN 2
#define IRQ_GATE_IN 0
#define PIN_LED_OUT 13
#define PIN_ANALOG_IN A1
void soundISR()
{
int pin_val;
pin_val = digitalRead(2);
}
#include <Servo.h>
int servoPin = 10;
int servoPin2 = 9;
int servoPin3 = 6;
Servo Servo1;
Servo Servo2;
Servo Servo3;
int angle = 0;
void setup()
{
Servo1.attach(servoPin);
Servo2.attach(servoPin2);
Servo3.attach(servoPin3);
Serial.begin(9600);
// configure input to interrupt
pinMode(2, INPUT);
// attachInterrupt(IRQ_GATE_IN, soundISR, CHANGE);
// Display status
Serial.println(“Initialized”);
}
void loop()
{
int value;
// Check the envelope input
value = analogRead(A5);
// Convert envelope value into a message
Serial.print(“Status: “);
if(value <=10)
{
Serial.println(“Quiet.”);
Serial.println(“In Quiet”);
Servo1.write(45);
Servo2.write(125);
Servo3.write(100);
Servo3.write(angle++);
delay(250);
}
else if(value >= 11)
{
Serial.println(“Loud.”);
Serial.println(“In Loud”);
Servo1.write(10);
Servo2.write(160);
delay(250);
//Servo1.write(90);
delay(100);
}
// pause for 1 second
delay(750);
}
The video of my project is shown here:
I wanted the sign to spin faster but I didn’t know how to programme and write the code so that it would do so. I changed the angles, tried to use the for() function but nothing would work out so I kept it as Servo3.write(angle++) which just essentially made it spin very slowly.
